How to use the policy editor
Contents
- 1. Invocation
- 2. Available commands
- 3. Operations specific to Domain Policy Editor screen
- 4. Operations specific to Domain Transition Editor screen
1. Invocation
You can execute the policy editor like below:
# /usr/sbin/tomoyo-editpolicy
The options described below can be specified as options on the command line.
1.1. Specifying policy directory
By default, the policy editor tool edits policy within the /sys/kernel/security/tomoyo/ directory.
Option | Meaning |
|---|---|
$ipaddress:$port | Connect to the policy editing agent process listening at a host with IPv4 address $ipaddress and port $port. |
/$path/$to/$directory | Edit the policy files in the policy/current/ subdirectory of the /$path/$to/$directory directory. Usually, /etc/tomoyo/ is specified. |
1.2. Specifying initial screen to display
By default, the policy editor displays "Domain Transition Editor" screen.
Option | Meaning |
|---|---|
e | "Exception Policy Editor" screen 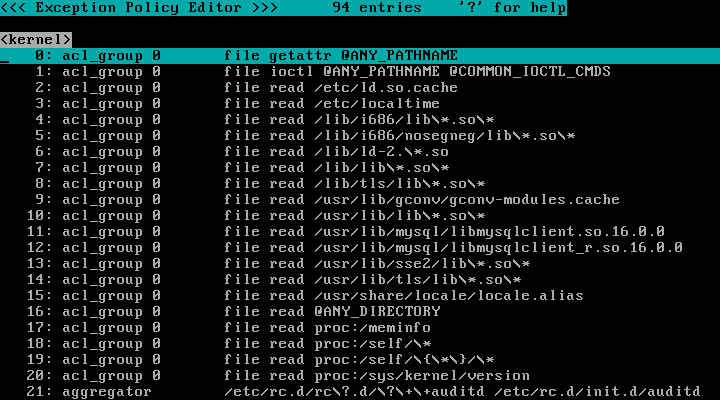
This screen is used for editing /sys/kernel/security/tomoyo/exception_policy . |
d | "Domain Transition Editor" screen 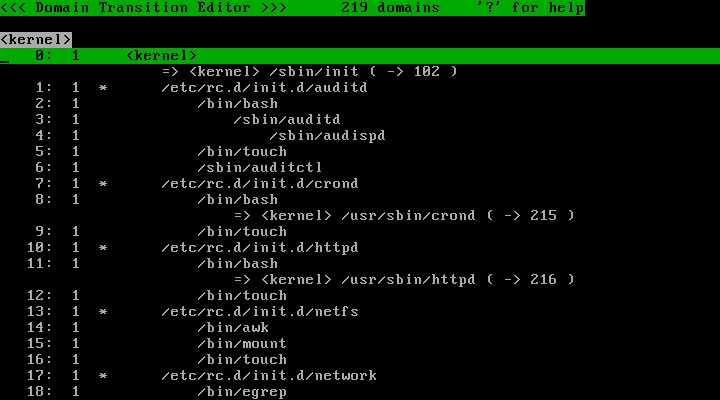
This screen is used for editing /sys/kernel/security/tomoyo/domain_policy . The first line shows what screen you are on and how many domains are listed. |
p | 
This screen is used for editing /sys/kernel/security/tomoyo/profile . |
m | "Manager Policy Editor" screen 
This screen is used for editing /sys/kernel/security/tomoyo/manager . |
n |
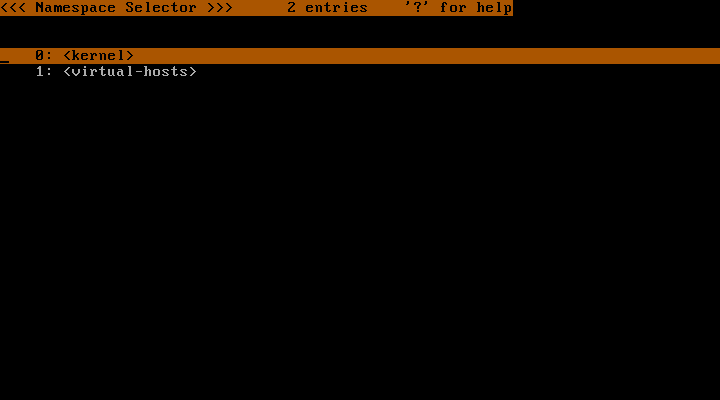
This screen is used for selecting the namespace to display. |
s |
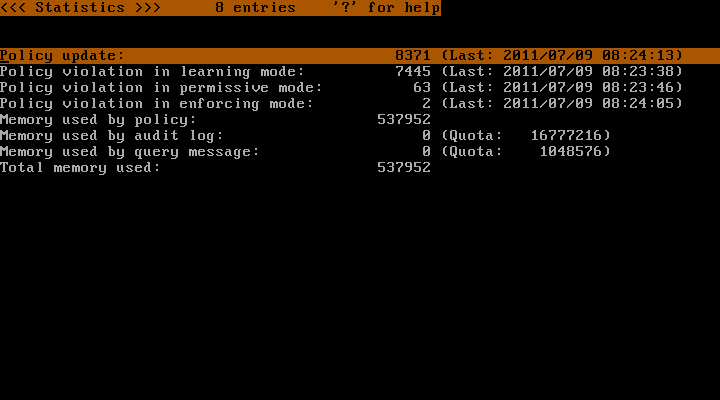
This screen is used for editing /sys/kernel/security/tomoyo/stat . |
1.3. Specifying initial namespace to display
The policy editor by default displays the "<kernel>" namespace.
Option | Meaning |
|---|---|
| <$namespace> | Displays the "<$namespace>" namespace. |
Each namespace has its own "Exception Policy Editor" screen, "Domain Transition Editor" screen and "Profile Editor" screen. Currently selected namespace is displayed on the third line of each screen.
You can switch namespaces from "Namespace Selector" screen or from Shortcuts displayed on "Domain Transition Editor" screen.
1.4. Specifying operation mode
The policy editor by defaults operates for both browsing and editing mode.
Option | Meaning |
|---|---|
readonly | Operate for browse-only mode. |
1.5. Specifying automatic refresh
The policy editor by default refreshes to the latest information only when the "r" key is pressed.
Option | Meaning |
|---|---|
refresh=$interval | Automatically refresh in $interval seconds. This option assumes that browse-only mode is used. |
2. Available commands
Since the policy editor uses ncurses interface, all operations can be done from the keyboard.
2.1. Scrolling
Key |
Scroll operation |
|---|---|
Up-arrow |
Scroll 1 line up. |
Down-arrow |
Scroll 1 line down. |
PageUp |
Scroll 1 page up. |
PageDown |
Scroll 1 page down. |
Right-arrow |
Scroll 1 column right. |
Left-arrow |
Scroll 1 column left. |
Home |
Move to the top of line. |
End |
Move to the bottom of line. |
2.2. Searching
Key |
Search operation |
|---|---|
"f" or "F" |
Find the first matching entry. To start searching, press the "f" key and type the string that you wish to search, and then press the "Enter" key: 
|
"n" or "N" |
Find the next matching entry. Continue searching in a forward direction (downwards) using previously typed string. |
"p" or "P" |
Find the previous matching entry. Continue searching in a backward direction (upwards) using previously typed string. |
2.3. Modifying
Key |
Modify operation |
|---|---|
Insert |
Copy an entry at the cursor position to history buffer. |
"a" or "A" |
Add an entry. To add an entry, press the "a" key and type the string that you wish to add, and then press the "Enter" key: 
The strings are saved in the history buffer and can be viewed by pressing the "Insert" key. |
Space |
Invert selection state of an entry at the cursor position. Move the cursor to the entry you wish to select and press the "Space" key. |
"c" or "C" |
Copy selection state of an entry at the cursor position to all entries below the cursor position. The selection state of the entry of the cursor line can be copied to all entries below by pressing the "c" key: 
This makes it easy to select all entries or a block of entries. |
"d" or "D" |
Delete selected entries. To delete an entry, move the cursor to the entry you wish to delete and press the "d" key: 
This can also be done by selecting all of the entries you wish to delete. |
"s" or "S" |
Set profile number of selected entries on "Domain Transition Editor" screen. |
Enter |
Edit ACLs of a domain at the cursor position on "Domain Transition Editor" screen. |
2.4. Misc
Key |
Miscellaneous action |
|---|---|
"q" or "Q" |
Quit the policy editor. |
"r" or "R" |
Refresh to the latest information. |
"w" or "W" |
Display the list of available screens. By pressing the "w" key, list of screens are displayed. By pressing a key from the screen, the corresponding screen is displayed: 
|
3. Operations specific to Domain Policy Editor screen
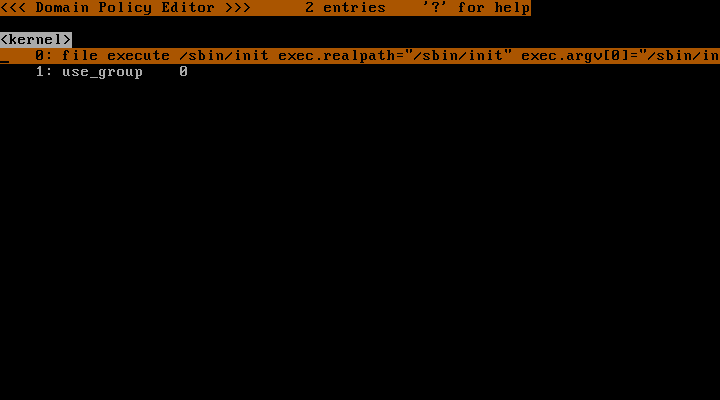
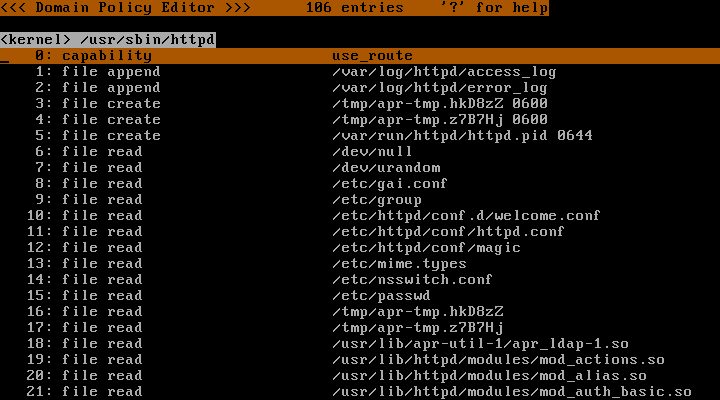
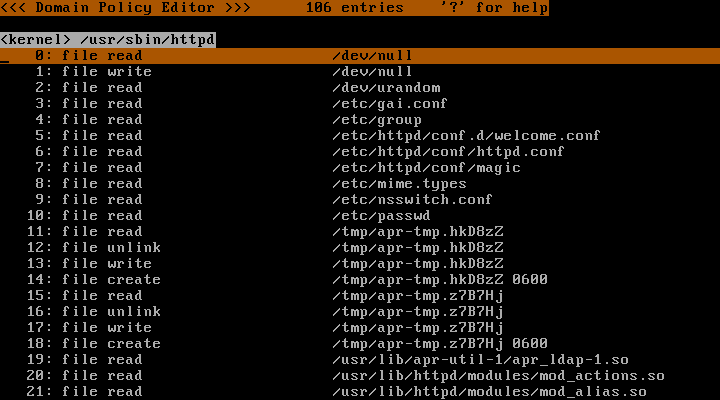
3.1. Domain Policy Editor screen
You can display this screen by pressing the Enter key (or pressing the "w" key and then pressing the "a" key") after moving the cursor to a domain at the "Domain Transition Editor" screen.
3.2. Converting ACL entries into patterns
Redundant entries can be removed by patterning entries (see Chapter 6: How do I develop policy?). Switch to the "Domain Policy Editor" screen and add an entry such as "file read /home/kumaneko/SVN/\{\*\}\/\*":
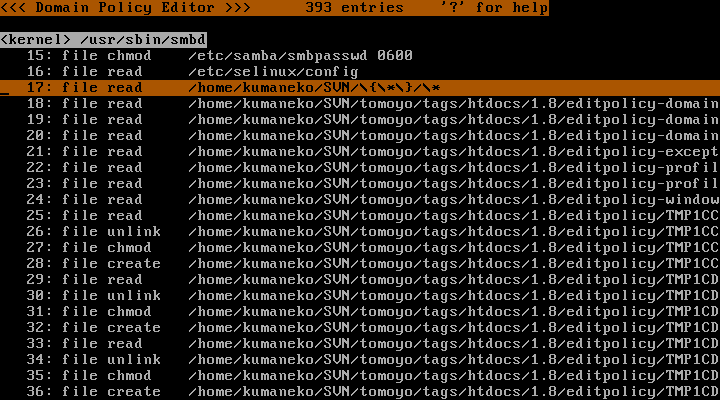
This manually added entry matches many of the entries that are already defined. Move the cursor to the patterned entry you have just added and press the "o" key. This will select all entries that are implied by the patterned entry:
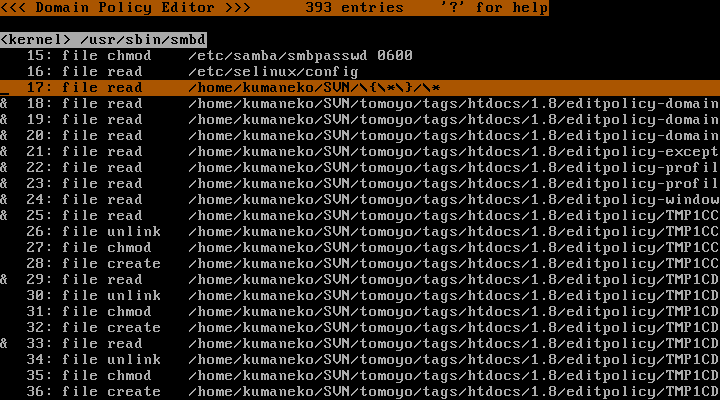
These can now be deleted with the "d" key. This can be repeated for any patterned entries that you add.
3.3. Sorting ACL entries
You can toggle sort order by pressing the "@" key.
4. Operations specific to Domain Transition Editor screen
4.1. Browsing domain transition patterns and exceptions
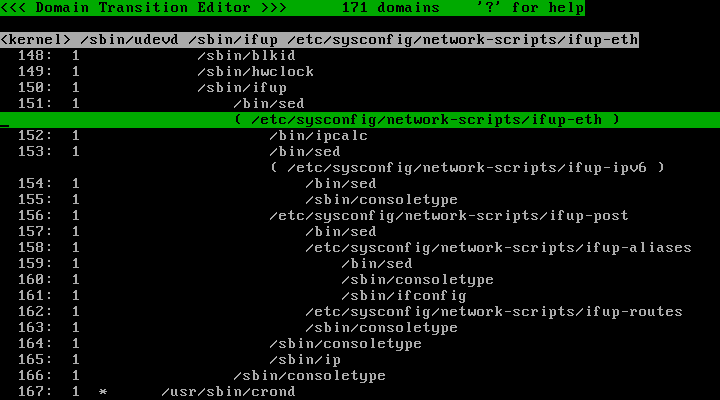
On this screen, the list of domains in the currently selected namespace and their domain transition patterns are displayed. Also, information on domain transition exceptions (if any) is displayed.
Lines with a line number at the start of the line (from 4.1.1 to 4.1.3) are information on existent domains. The number after the line number is the profile number assigned to that domain.
Lines without a line number at the start of the line (from 4.1.4 to 4.1.7) are information on nonexistent domains. These lines are displayed as an indent keeper when parent domains do not exist or are displayed as a shortcut that indicates the destination domain when domain transition exceptions occur.
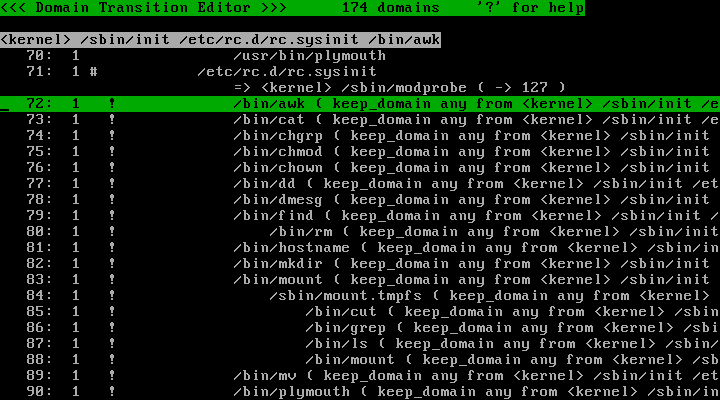
4.1.1. Domains with the "!" mark
This mark indicates that this domain is unreachable due to the directive in parenthesis.
You can delete unreachable domains if you don't wish to make these domains reachable by changing the directive in parenthesis.
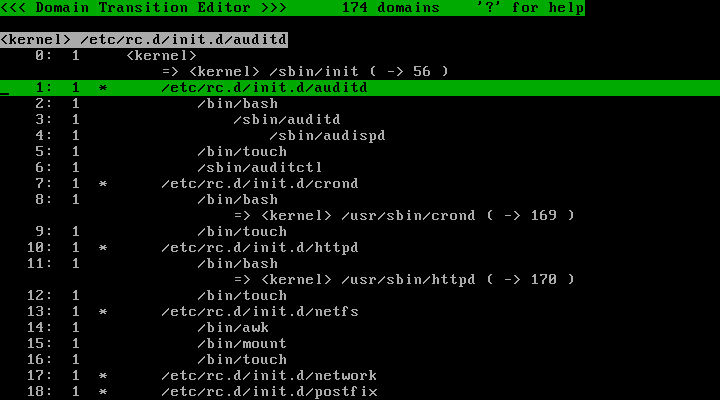
4.1.2. Domains with the "*" mark
This mark indicates that this domain may be reachable from other than the parent of this domain.
4.1.3. Domains with the "#" mark
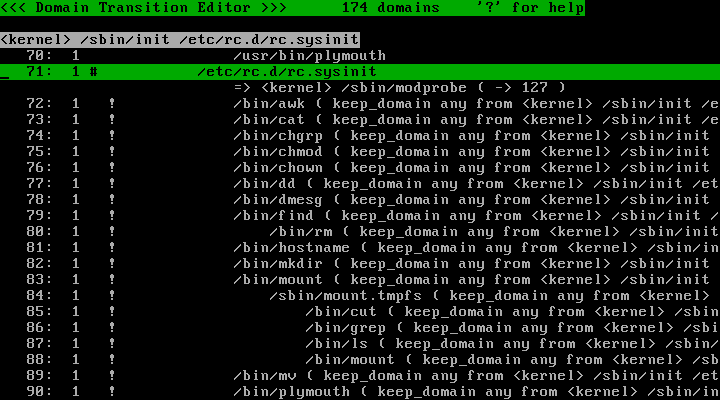
This mark indicates that multiple programs might belong to this domain.
4.1.4. Domains with "( -> n )"
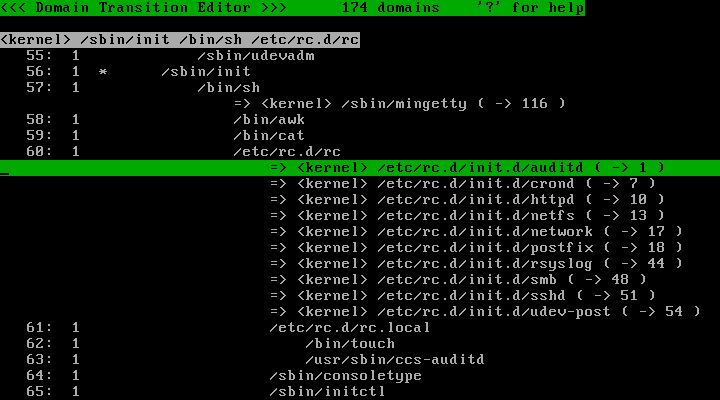
The process transits to the domain that is in the currently displayed namespace at the line number specified by "n" due to domain transition exceptions.
4.1.5. Domains with "( -> Namespace Jump )"
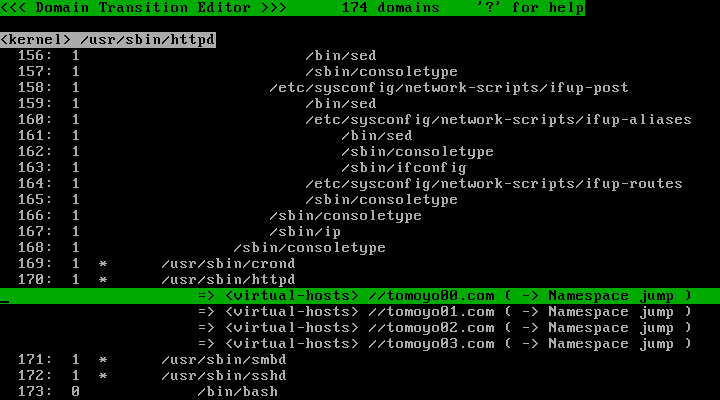
The process transits to the domain that is not in the currently displayed namespace due to domain transition exceptions.
4.1.6. Domains with "( -> Not Found )"
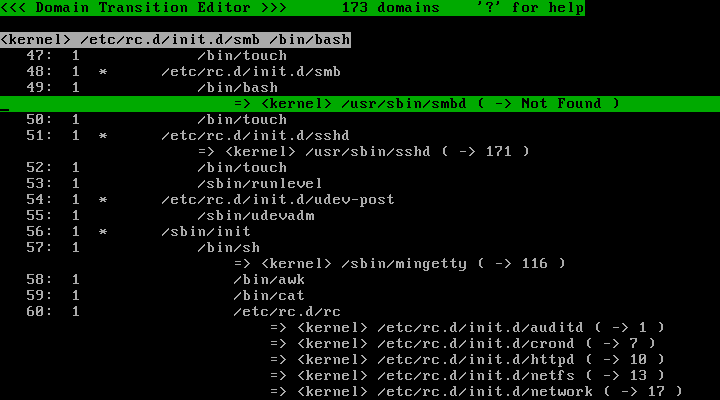
The destination domain specified by domain transition exceptions does not exist.
4.1.7. Domains in parenthesis
This domain does not exist. This line is displayed for avoiding tree indent breakage.
4.2. Changing profile number
Press the "s" key, type the profile number you wish to set, and press the "Enter" key:

4.3. Editing ACL by domain name
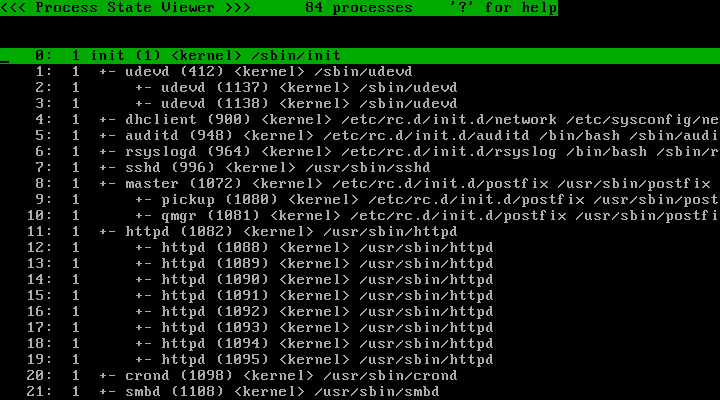
You can enter the "Domain Policy Editor" screen by pressing the Enter key (or pressing the "w" key and then pressing the "a" key") after moving the cursor to a domain at the "Domain Transition Editor" screen. You can return to the "Domain Transition Editor" screen by pressing the Enter key (or pressing the "w" key and then pressing the "d" key") from the "Domain Policy Editor" screen.


4.4. Editing ACL by currently running task
You can enter the "Process State Viewer" screen by pressing the "@" key from the "Domain Transition Editor" screen. In this screen, the list of currently running tasks and information on domains which these tasks belong to are displayed like pstree command. You can enter the "Domain Policy Editor" screen by moving the cursor to a task that you wish to browse or edit and then pressing the Enter key (or pressing the "w" key and then pressing the "a" key"). You can return to the "Domain Transition Editor" screen by pressing the "@" key from the "Process State Viewer" screen.

