Chapter 4: How does TOMOYO Linux work?
4.1. Understanding domains
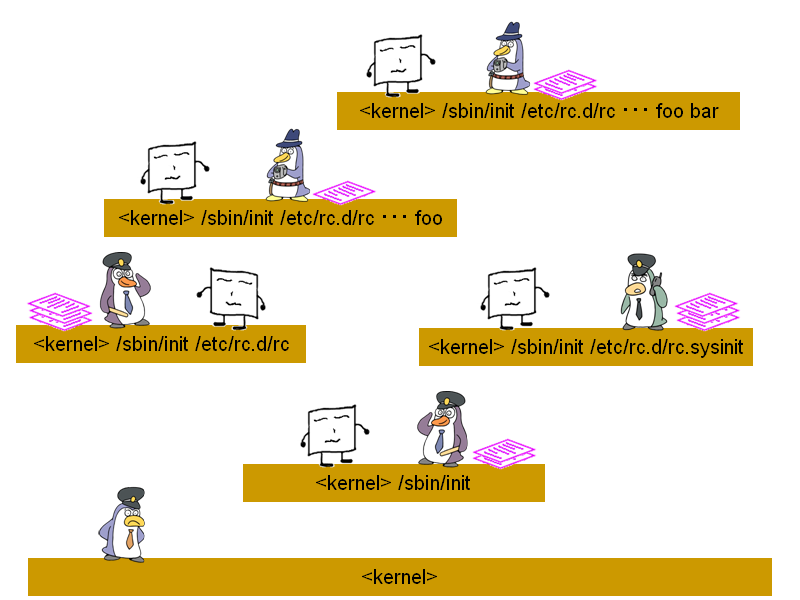
In TOMOYO Linux, the technique used to enforce MAC makes use of something called "domains". This is an important concept. Every process in a system belongs to a domain, which is determined by its execution history. Broadly speaking, every time a process is executed, a new domain is created. Any particular domain is represented by a concatenation of all previously executed pathanames. This creation of a new domain can also be called a "domain transition". Have a look at this diagram:
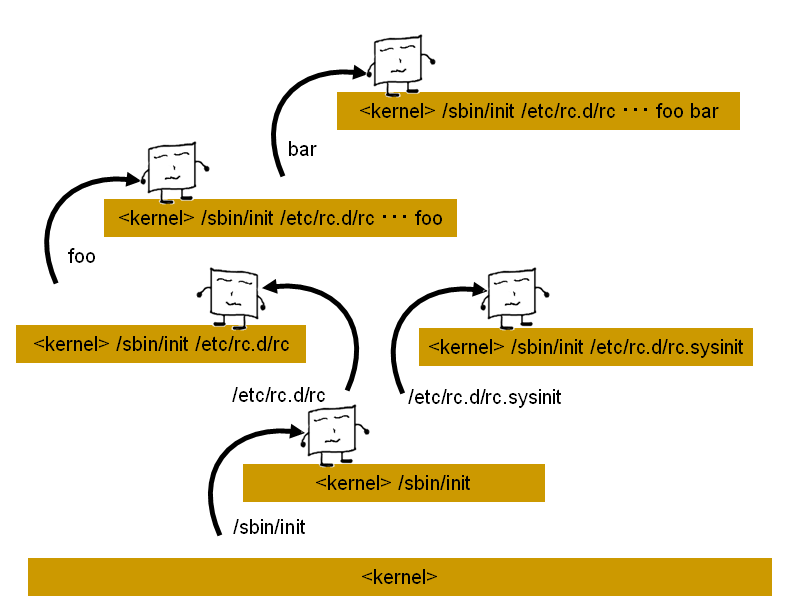
The kernel is always the first domain and is represented in TOMOYO Linux by <kernel>. In this example, the kernel then executes /sbin/init. Because a process has been executed, a new domain is created which in this case is the domain <kernel> /sbin/init. The bootup scripts are then executed, which result in further domains being created.
The process execution history is important. Consider the following domains:
<kernel> /sbin/init /etc/rc.d/rc
<kernel> /sbin/init /etc/rc.d/rc.sysinit /etc/rc.d/rc
In both cases, the script "/etc/rc.d/rc" is the process causing a new domain to be created. However, because the process execution history is different, they are considered to be two separate domains. This allows you to control what can be executed by any particular domain, and allows policy to be more flexible as you can apply different levels of restriction to a process depending on how it was executed. There is also the possibility to manage domain transition very precisely and for example apply the same restriction to a process without regard to how it was executed. This topic will be discussed later.
4.2. View domains with the policy editor
Let's have a look at the policy editor to get a better understanding of domains. This is the main tool used with TOMOYO Linux and it is important to become comfortable using it. The instructions on this page can be supplemented with this page describing How to use the Policy Editor.
Once the system has been rebooted into the TOMOYO Linux kernel, run the policy editor with the "/etc/tomoyo/" option to edit policy files within the "/etc/tomoyo/" directory:
# /usr/sbin/tomoyo-editpolicy /etc/tomoyo/
The policy editor provides a number of "screens" that each serve a different role. The default screen that greets the user is the "Domain Transition Editor". The picture below describes the domain tree that should be visible after running the above command. As of now, only the "<kernel>" domain is defined:
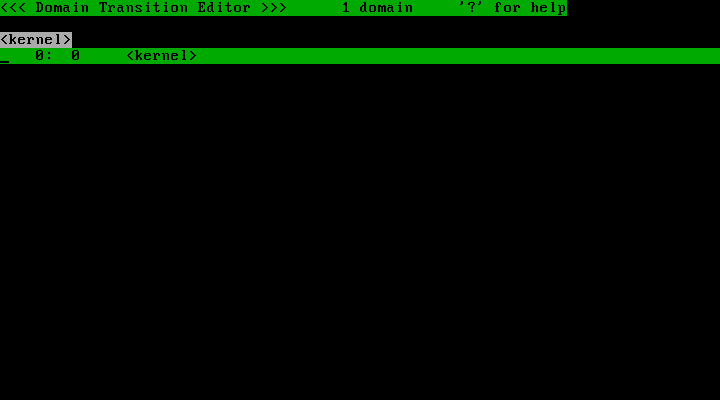
Since this is a newly initialized policy, the policy files in "/etc/tomoyo/" are empty. There are two sets of policy involved in TOMOYO Linux: policy loaded in the kernel, and policy saved to "/etc/tomoyo/". Many sets of policies can be saved to "/etc/tomoyo/" and can be loaded into the kernel at boot or on demand. Saving policy to disk will be discussed in later. Press the "q" key to quit the policy editor.
Now run the policy editor again without the "/etc/tomoyo/" option in order to view the policy that is loaded in the kernel:
# /usr/sbin/tomoyo-editpolicy
As the system runs, TOMOYO Linux will record the creation of new domains and add them to the tree. After running the above command, the domain tree should appear populated with all domains created since startup:
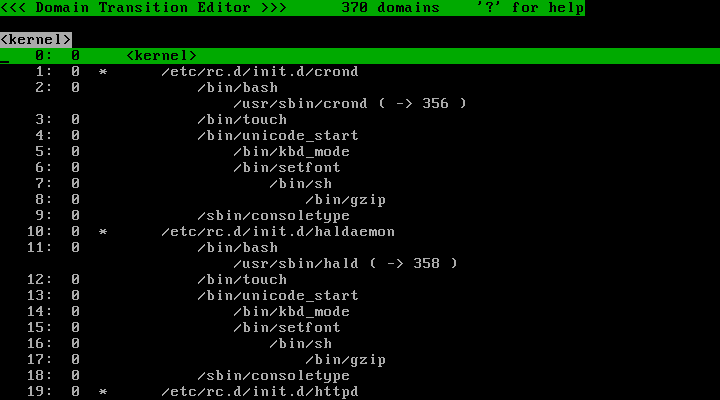
The first line shows what screen you are on and how many domains are listed.
The second line is the message area.
The third line shows the domain name currently selected by the cursor.
The fourth line and downwards are the domains currently defined.
Try executing some commands and see where new domains are created. You can do this while you still have the policy editor running.
You can scroll using the arrow keys and/or the Home/End/PageUp/PageDown keys.
Press the "r" key to refresh the contents of the screen.
Press the "f" key to find an entry.
Press the "?" key to view the available commands. Press the "?" again to go back to the previous screen.
Note that a new domain is only created if it is unique, so executing the same command over and over again will not result in the creation of many domains.
4.3. Understanding profiles
Each domain can be restricted using TOMOYO Linux by assigning a "profile". These profiles can be assigned to any domain independently of others, which allows you to slowly build up the security in your system one domain at a time. This also allows you to create custom profiles for specific domains, but this is a more advanced topic for later on.
In the policy editor, look at the numbers in the second column of each line:
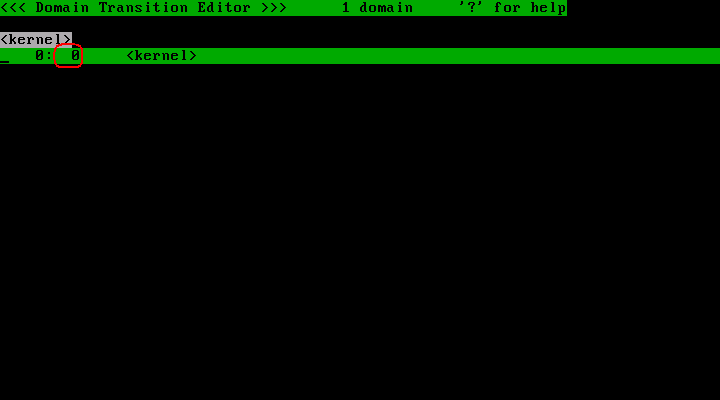
This number is called the "profile number". A profile number is an integer value which takes between 0 and 255. The default profile number is "0", also known as "Disabled Mode", in which the domain is completely unrestricted.
Press the "w" key to list the different "screens" that can be viewed using the policy editor:
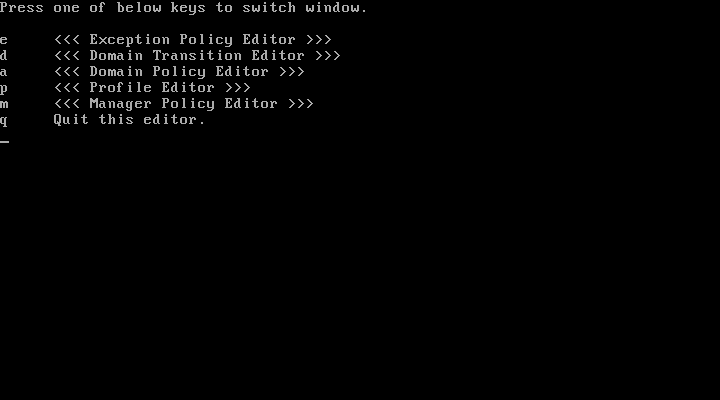
Press the "p" key to select the "Profile Editor", and you will see the list of profiles:
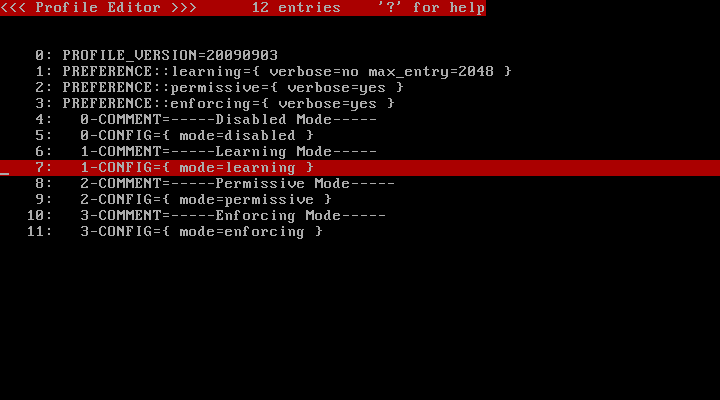
Each profile contains 3 fields:
Name |
Control |
|---|---|
COMMENT |
Description of the profile. |
CONFIG |
Configuration of operation mode. |
PREFERENCE |
Configuration of various options. |
The "mode" parameter of the CONFIG line can contain one of the following values:
Value |
Meaning |
|---|---|
disabled |
Works as if a regular kernel. |
learning |
Do not reject an access request if the request violates policy. Append the request to policy. |
permissive |
Do not reject an access request if the request violates policy. Do not append the request to policy. |
enforcing |
Reject an access request if the request violates policy. Do not append the request to policy. |
The PREFERENCE line holds the following options:
Name |
Function |
|---|---|
max_entry |
Sets the maximum number of domain policy entries appended by "Learning Mode" |
enforcing_penalty |
Sets the length of time a process is forced to sleep after policy violation |
Thus, there are four default profiles that each play a different role:
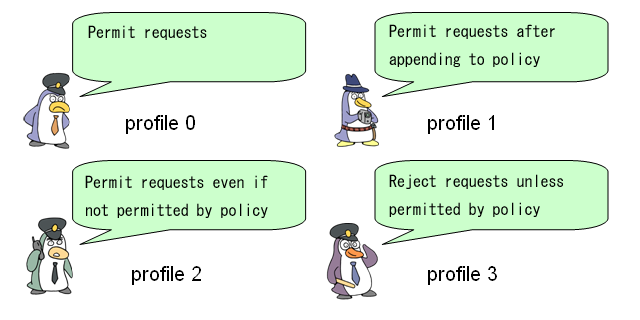
Each of these profiles can be assigned to a domain:
The "Learning Mode" profile is the feature of TOMOYO Linux that makes developing policy very easy. This mode will automatically generate policy for any domain that has this profile selected. This can then be developed and refined into a solid policy. The other profiles, "Permissive Mode" and "Enforcing Mode", are for later on when a domain is ready to be restricted.
For further information on management of profiles, read Chapter 9: Advanced profile management.
4.4. Understanding domain policy
The restrictions of each domain can be viewed using the "Domain Policy Editor" screen, which can be accessed by selecting a domain in the "Domain Transition Editor" screen, and then pressing the "Enter" key. Since no policy has been developed yet, the screen is empty. This is an example of domain policy for Apache:
(Click to view complete screen.)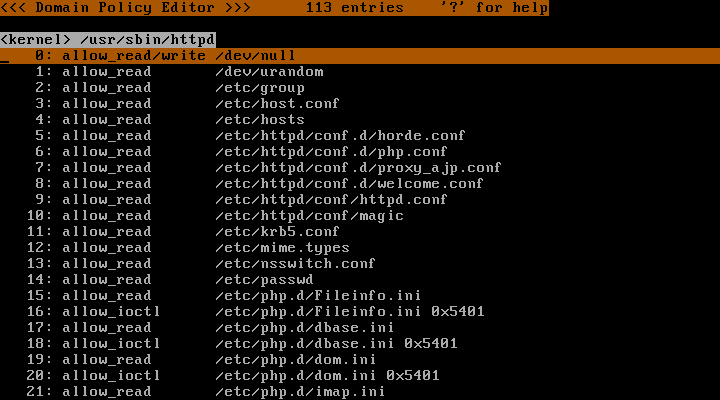
The permissions in domain policy are represented here with directives such as "allow_read" and "allow_write". Once the domain is placed in "Enforcing Mode", only the permissions defined in domain policy will be allowed, as well as the permissions defined in exception policy (see 4.5: Understanding exception policy). In order to develop a policy of least privilege that still allows normal usage, the "Learning Mode" and "Permissive Mode" can be used. For in depth details on the directives that can be used in domain policy, see Domain policy syntax located in Appendix B: Policy specification.
4.5. Understanding exception policy
Press the "w" key, then press the "e" key, and you will see the "Exception Policy Editor" screen:
(Click to view complete screen.)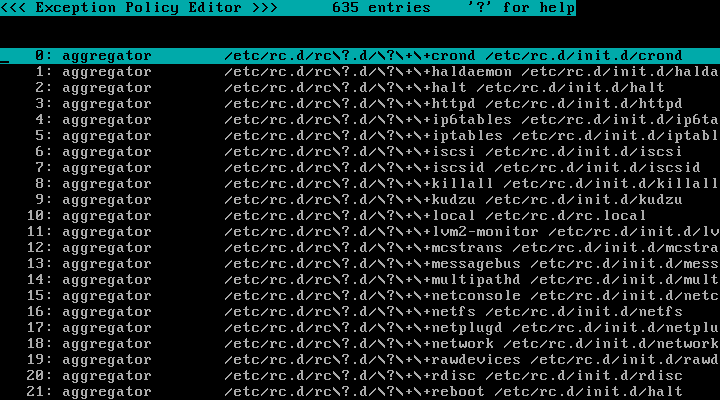
You can scroll this window using the arrow keys and/or the Home/End/PageUp/PageDown keys.
The permissions here are similar to those in the domain policy, but apply to all domains. Permissions defined here will not be displayed in domain policy, and access requests from any domain that match a permission in exception policy will be automatically accepted. The exception policy can also be used to shorten and simplify domain policy for each domain by using the group directives.
For in depth details on the directives that can used in exception policy, see Exception policy syntax located in Appendix B: Policy specification.